Matar Kachori – A Crispy and Delicious Indian Snack

matar kachori

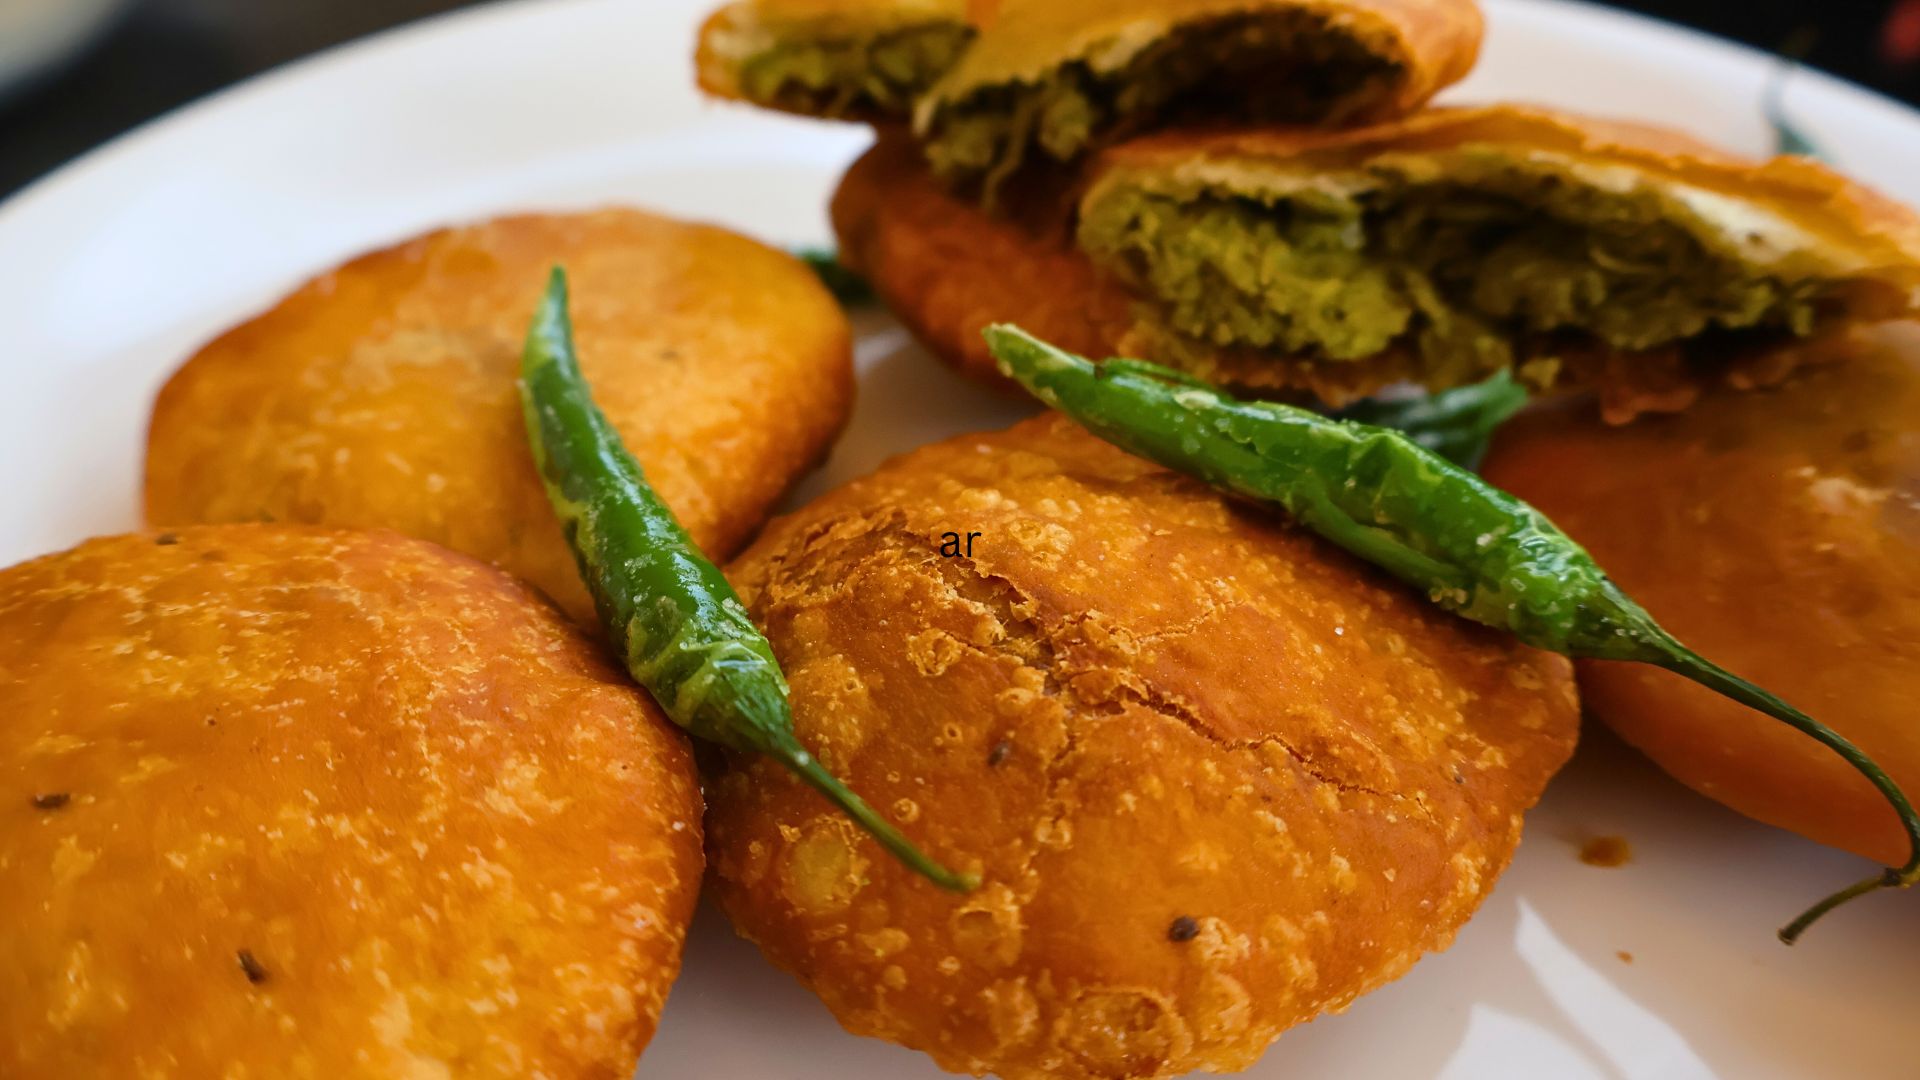
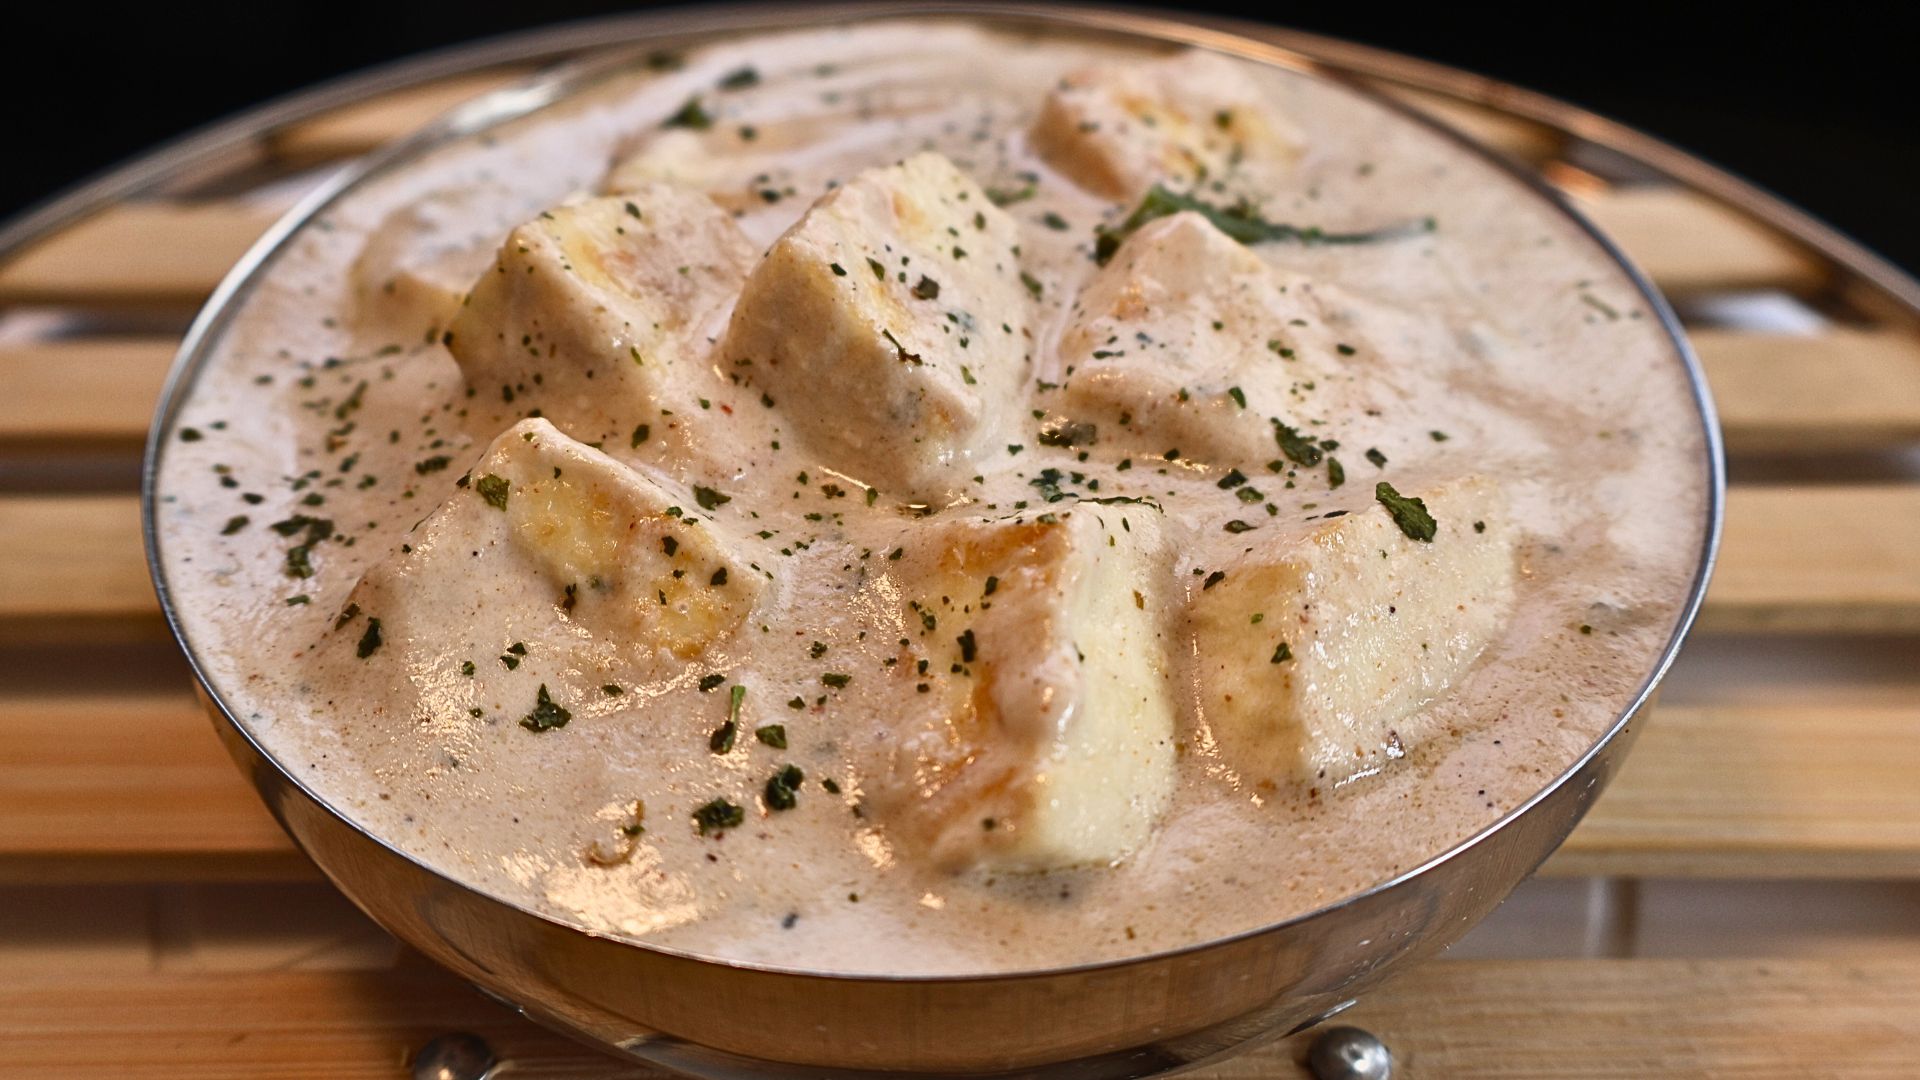
Matar Kachori is a popular deep-fried Indian snack, loved for its crispy outer shell and flavorful, spiced green pea filling. This dish is a favorite in North Indian households, often enjoyed with chutneys, aloo sabzi, or simply with a cup of chai. Whether you’re making it for a festive occasion, a special weekend breakfast, or just as a treat, matar kachori never fails to impress. In this detailed guide, we will explore the ingredients, step-by-step recipe, expert tips, serving ideas, common mistakes to avoid, and even the history and health benefits of this iconic dish. Ingredients For the Dough For the Filling For Frying Step by Step Recipe for Matar Kachori Step 1: Prepare the Green Pea Filling Step 2: Prepare the Dough Step 3: Assemble the Matar Kachori Step 4: Fry the Matar Kachoris Tips for Perfection Serving Suggestions Common Mistakes to Avoid History and Origin Matar Kachori has its roots in North India, particularly in states like Rajasthan and Uttar Pradesh. Traditionally, kachoris were made with lentils or spicy potato fillings. Over time, green peas became a popular variation, especially during the winter season when fresh peas are abundant. The concept of stuffed deep-fried snacks dates back centuries in Indian culinary history. Kachoris were originally made in royal kitchens and then became a common street food delicacy across India. Health Benefits While Matar Kachori is an indulgent treat, it does have some nutritional benefits: To make a healthier version, you can bake or air-fry the kachoris instead of deep frying. Variations Regional Cuisines Frequently Asked Questions (FAQs) 1. Can I make the filling in advance? Yes, you can prepare the filling and store it in the refrigerator for up to 2 days. 2. Can I freeze the kachoris? Yes, half-fried kachoris can be frozen and fried later for fresh crispness. 3. Why do my kachoris turn soft after frying? This happens if there is too much moisture in the dough or if they are fried at high heat. 4. Can I use whole wheat flour instead of all-purpose flour? Yes, but the texture will be slightly denser. 5. How do I reheat leftover kachoris? Reheat in an oven or air fryer at 180°C for 5-10 minutes to regain crispiness. Matar Kachori is a must-try dish that brings joy with every crispy, flavorful bite. Whether you enjoy it as a snack, breakfast, or part of a festive meal, its irresistible taste makes it a favorite across generations. To know more about Kachori click here. Few of our other Trending Recipes: Malai Paneer Recipe: A Creamy Delight for Every Occasion Aloo Gobi Recipe: A Classic Indian Comfort Dish

Malai Paneer Recipe: A Creamy Delight for Every Occasion

Malai Paneer

Malai Paneer is a rich, creamy, and flavorful dish that holds a special place in Indian cuisine. This velvety smooth paneer dish is made with fresh cream (malai), aromatic spices, and soft paneer cubes, making it a perfect indulgence for those who love mild yet decadent flavors. Whether you’re preparing a special meal for guests or just craving a luxurious homemade curry, Malai Paneer is a perfect choice. In this article, we’ll take you through a step-by-step recipe, essential tips for making it perfect, serving suggestions, and some interesting variations. Let’s dive into the world of this mouthwatering dish! Ingredients Before you start cooking, gather these ingredients to make an authentic and delicious Malai Paneer: For the Gravy: For the Creamy Texture: For Garnishing: Step-by-Step Recipe Step 1: Frying the Paneer Step 2: Preparing the Base Step 3: Cooking the Masala Step 4: Adding the Creamy Touch Step 5: Adding the Paneer Tips for Perfection Serving Suggestions Malai Paneer pairs well with various Indian breads and rice dishes, such as: Common Mistakes to Avoid History and Origin Malai Paneer originates from North Indian cuisine, particularly from Punjabi kitchens, where dairy-based dishes are popular. The use of fresh cream, butter, and paneer is a hallmark of Punjabi food, known for its rich and indulgent flavors. Over time, this dish has become a favorite across India and even in international Indian restaurants. Health Benefits Variations Regional Cuisines and Influences Frequently Asked Questions (FAQs) 1. Can I make Malai Paneer without cream? Yes! You can substitute cream with full-fat milk and a bit of cashew or almond paste for a similar texture. 2. How do I store Malai Paneer? Store it in an airtight container in the refrigerator for up to 2 days. Reheat gently with a splash of milk. 3. Can I use store-bought paneer? Yes, but soak it in warm water for 10 minutes to soften it before using. 4. Is Malai Paneer spicy? No, it has a mildly spiced and creamy taste. You can adjust the spice level to your preference. 5. Can I freeze Malai Paneer? It’s not recommended as the cream-based gravy may separate when thawed. Malai Paneer is a comforting and indulgent dish that you can easily prepare at home. With the right ingredients and techniques, you can enjoy restaurant-style flavors in your own kitchen. Try this recipe and treat yourself to a creamy delight! To know more about Paneer click here. Few of our other Trending Recipes: Gajar Halwa Recipe – A Traditional Indian Delight Lasooni Methi Recipe – A Garlic and Fenugreek Delight

Lasooni Methi Recipe – A Garlic and Fenugreek Delight

Lasooni methi

Lasooni Methi is a delicious and aromatic Indian dish made with fresh fenugreek leaves (methi) and a generous amount of garlic (lasoon). This dish combines the slightly bitter taste of methi with the bold and rich flavor of garlic, creating a unique balance of flavors. It is a popular dish in North Indian households and is often enjoyed with rotis, parathas, or steamed rice. Whether you’re looking for a healthy, nutrient-packed meal or simply a flavorful side dish, Lasooni Methi is a great choice. Ingredients To prepare Lasooni Methi, you need the following ingredients: Main Ingredients: Spices and Seasoning: Optional Ingredients: Step-by-Step Recipe Step 1: Roasting and Grinding the Base Masala Step 2: Preparing the Fenugreek Leaves Step 3: Making the Final Dish Step 4: Final Touches and Serving Tips for Perfection Serving Suggestions Common Mistakes to Avoid History and Origin Lasooni Methi is rooted in North Indian cuisine, particularly in Punjab and Rajasthan, where garlic is widely used to enhance flavors. The dish is an extension of traditional methi-based sabzis, incorporating the rich, garlicky taste for a bold and comforting meal. Health Benefits of Lasooni Methi Variations of Lasooni Methi Regional Cuisines and How They Adapt the Recipe Frequently Asked Questions (FAQs) 1. Can I use dried methi (Kasuri Methi) instead of fresh methi? Yes, but dried methi has a more concentrated flavor, so use only 2-3 tablespoons for this recipe. 2. How do I store leftover Lasooni Methi? Store it in an airtight container in the refrigerator for up to 2 days. Reheat before serving. 3. Can I make this recipe without garlic? Garlic is the key ingredient, but if you prefer, you can reduce or skip it and add more onions for flavor. 4. Is this dish good for weight loss? Yes! Methi is low in calories and high in fiber, making it a great addition to a weight-loss diet. 5. Can I add potatoes or other vegetables to this dish? Absolutely! Adding potatoes, carrots, or bell peppers can enhance the dish and make it more filling. To know more about Methi (Fenugreek) click here To know more about Lasoon (Garlic) click here Few of our other Trending Recipes: Bhagar Amti Recipe: A Perfect Dish for Fasting Days Drumstick Curry: A Delicious and Nutritious Indian Delight

Akkha Masoor Dal Recipe – A Nutritious Delight

akkha masoor dal recipe

Akkha Masoor Dal recipe is a flavorful and protein-rich lentil dish made with whole brown lentils (masoor dal) and aromatic spices. This dish is a staple in Maharashtrian cuisine and is known for its rich, earthy flavors and wholesome texture. Unlike split masoor dal, which turns mushy when cooked, whole masoor retains its shape, giving the dish a hearty bite. Whether served with rice, chapati, or bhakri, this dal is a comforting meal that can be enjoyed by everyone. Watch Recipe Video Ingredients To prepare a delicious Akkha Masoor Dal recipe, gather the following ingredients: To Cook Akkha Masoor Dal: For Dry Masala: For Main Dish For Seasoning: Optional Ingredients: Step-by-Step Akkha Masoor Dal Recipe Step 1: Preparing the Masoor Dal Step 2: Cooking the Dal Step 3: Preparing Dry Roasted Masala Step 4: Preparing the Final Dish Step 5: Tempering (Tadka) Tips for Perfection Serving Suggestions Common Mistakes to Avoid History and Origin of Akkha Masoor Dal Recipe Akkha Masoor Dal recipe has its roots in Maharashtrian cuisine, especially in rural areas where lentils are a staple protein source. The word “Akkha” means “whole,” referring to the use of whole masoor dal instead of split lentils. Traditionally, it is cooked in clay pots with locally available spices, giving it a unique taste. Health Benefits Variations Regional Cuisines Frequently Asked Questions (FAQs) 1. Can I cook Akkha Masoor Dal recipe without a pressure cooker?Yes, you can cook it in a regular pot, but it will take longer (about 30-40 minutes). 2. Can I freeze Akkha Masoor Dal?Yes, you can freeze it in an airtight container for up to 3 months. Thaw and reheat before serving. 3. How do I make it creamier?Mash some cooked lentils or add a little coconut milk for a creamier texture. 4. Can I add vegetables to Akkha Masoor Dal Recipe dal?Yes, carrots, spinach, or bell peppers can be added for extra nutrition. 5. Is Akkha Masoor Dal Recipe gluten-free?Yes, it is naturally gluten-free and safe for gluten-intolerant individuals. To know more about Akkha Masoor(Red Lentils) click here. Few of our other Trending Recipes: Pav Bhaji Recipe: A Delicious Journey Through India’s Favorite Street Food Palak Paneer Recipe: A Flavorful and Nutritious Indian Classic

Peas Pulao(Matar Pulao) Recipe: A Flavorful and Easy One-Pot Dish

peas pulao

Peas Pulao, also known as Peas Pulao, is a simple yet delicious rice dish made with fragrant basmati rice, green peas, and aromatic spices. This one-pot meal is widely enjoyed across India and other South Asian countries due to its ease of preparation and delightful taste. Whether served as a standalone dish or paired with curries and yogurt-based sides, Peas Pulao is a perfect choice for a comforting and satisfying meal. In this article, we will explore everything about Peas Pulao, including its ingredients, step-by-step recipe, tips for perfection, serving suggestions, common mistakes to avoid, and much more. Ingredients To prepare a delicious Peas Pulao, you will need the following ingredients: Main Ingredients: Optional Ingredients for Extra Flavor: Step-by-Step Recipe Follow this step-by-step guide to make perfect Peas Pulao at home. Step 1: Preparing the Rice Step 2: Cooking the Spices Step 3: Cooking the Peas and Rice Step 4: Simmering the Pulao Step 5: Fluff and Serve Tips for Perfection Serving Suggestions Peas Pulao pairs beautifully with a variety of side dishes. Here are some serving suggestions: Common Mistakes to Avoid History and Origin Peas Pulao has its roots in Mughlai and Persian cuisine, which introduced aromatic rice dishes to the Indian subcontinent. Over time, it became a staple in many South Asian households, known for its simplicity and comforting flavors. Traditionally, pulao was considered a royal dish prepared with saffron and nuts, but the simpler versions like Peas Pulao became popular for everyday meals. Health Benefits Peas Pulao is not just tasty but also offers several health benefits: Variations Peas Pulao can be customized in many ways to suit different tastes: Regional Cuisines Different regions have their own versions of Matar Pulao: Frequently Asked Questions (FAQs) 1. Can I make Matar Pulao in a rice cooker?Yes! Follow the same steps, but cook everything in a rice cooker instead of a stovetop. 2. Can I use brown rice instead of basmati?Yes, but increase the cooking time and water ratio accordingly. 3. How do I store leftover Matar Pulao?Store it in an airtight container in the refrigerator for up to 2 days. Reheat with a splash of water to retain moisture. 4. Can I make it without onions and garlic?Absolutely! Just skip them and add extra whole spices for flavor. 5. What can I use instead of peas?You can replace peas with corn, chickpeas, or mixed vegetables. Matar Pulao is an easy and flavorful dish that suits every occasion. Whether you are a beginner or an experienced cook, this simple recipe is sure to become a staple in your kitchen! To know more about Peas pulao click here. Few of our other Trending Recipes: Pav Bhaji Recipe: A Delicious Journey Through India’s Favorite Street Food Palak Paneer Recipe: A Flavorful and Nutritious Indian Classic

Ukadiche Modak Recipe: A Traditional Maharashtrian Dumpling

Ukadiche Modak

Ukadiche Modak is a famous traditional Indian sweet dumpling, primarily associated with Maharashtra. The name “Ukadiche” translates to “steamed” in Marathi, indicating the cooking method used for these delicious treats. These sweet dumplings are filled with a rich coconut and jaggery stuffing, encased in a soft rice flour dough, and steamed to perfection. Ukadiche Modak holds special significance during Ganesh Chaturthi, a festival dedicated to Lord Ganesha. It is believed to be his favorite sweet, and devotees prepare these as an offering to seek his blessings. With its delicate texture and divine sweetness, Ukadiche Modak is a must-try recipe for any festive occasion. Watch Ukadiche Modak Recipe Video Ingredients Before we get started, let’s take a look at the ingredients required to make these mouthwatering Modaks. For the Outer Covering: For the Sweet Coconut Filling: Step-by-Step Recipe for Ukadiche Modak Now, let’s go through the detailed step-by-step method to prepare authentic Ukadiche Modak at home. Step 1: Prepare the Coconut-Jaggery Filling Step 2: Make the Rice Flour Dough Step 3: Shape the Modaks Step 4: Steam the Modaks Tips for Perfection Serving Suggestions Common Mistakes to Avoid History and Origin Ukadiche Modak traces its roots to Maharashtra and has been mentioned in ancient texts. It is believed that Lord Ganesha loved these sweets, which is why they are prepared as prasad (offering) during Ganesh Chaturthi. Health Benefits Variations Regional Cuisines Frequently Asked Questions (FAQs) 1. How to store Ukadiche Modak?Steamed Modaks stay fresh for 1 day at room temperature and 2-3 days in the refrigerator. 2. Can I use wheat flour instead of rice flour?Traditional Modaks use rice flour, but you can experiment with wheat flour for a different texture. 3. What is the best way to prevent cracks in Modak?Knead the dough while warm and keep it covered with a damp cloth. 4. Can Ukadiche Modak be made without a mold?Yes, shaping by hand is the traditional method. Simply pinch and fold the edges carefully. 5. How long do steamed Modaks last?They taste best when fresh but can last 2-3 days if refrigerated. Ukadiche Modak is not just a sweet; it’s a cultural experience that brings families together during festivals. Try this authentic recipe and enjoy the divine taste of this Maharashtrian delicacy! To know more about Ukadiche Modak click here Few of our other Trending Recipes: Misal Pav Recipe: A Spicy Delight from Maharashtra Pohe Recipe: A Step-by-Step Guide

Methi Matar Malai Recipe – A Creamy and Flavorful Delight

Methi Matar Malai

Methi Matar Malai is a rich and creamy North Indian curry made with fresh fenugreek leaves (methi), green peas (matar), and cream (malai). This mildly spiced methi matar malai dish is a favorite in Indian households and restaurants, offering a perfect balance of slight bitterness from methi, sweetness from peas, and richness from malai. It pairs wonderfully with roti, naan, or rice and is ideal for special occasions or simple family meals. Let’s make this delicious and aromatic methi matar malai recipe step by step! Watch Video for Methi Matar Malai Recipe Ingredients For the Curry: Step-by-Step Recipe for Methi Matar Malai Step 1: Preparing the Fenugreek Leaves Step 2: Cooking the Base Masala Step 3: Cooking the Fenugreek Leaves Step 4: Making the Creamy Sauce Step 5: Final Touches Tips for Perfection Serving Suggestions Common Mistakes to Avoid History and Origin Methi Matar Malai is a modern North Indian dish, believed to have been influenced by Mughlai cuisine, which is known for its rich, creamy gravies. It gained popularity as a vegetarian alternative to Mughlai non-vegetarian dishes, incorporating Indian spices and dairy-based richness. Health Benefits Variations Regional Cuisines While Methi Matar Malai is a North Indian dish, similar variations exist in different parts of India. Frequently Asked Questions (FAQs) 1. Can I use dried methi instead of fresh leaves? Yes! Use 1 tablespoon of kasuri methi instead of fresh leaves, but the taste will be slightly different. 2. What can I use instead of cream? You can use milk, yogurt, or cashew paste for a lighter version of methi matar malai dish. 3. Is this dish spicy? No, Methi Matar Malai is a mildly spiced dish with a creamy and slightly sweet taste. 4. Can I make this dish ahead of time? Yes, but fresh methi tends to release water. Store it in the fridge and reheat gently before serving. 5. How do I balance the bitterness of methi? Soaking and squeezing methi leaves helps. You can also add a pinch of sugar or honey to balance the flavors. To know more about Methi click here. Few of our other Trending Recipes: Pav Bhaji Recipe: A Delicious Journey Through India’s Favorite Street Food Palak Paneer Recipe: A Flavorful and Nutritious Indian Classic

Rajma Chawal Recipe: A Classic Comfort Food of India

Rajma Chawal

Rajma Chawal is one of the most beloved North Indian dishes, cherished for its rich, spicy, and flavorful curry paired with steamed rice. This heartwarming dish features red kidney beans (rajma) cooked in a thick tomato-based gravy, loaded with aromatic spices. It’s a staple in Indian households and is enjoyed as a wholesome meal that satisfies both the stomach and soul. In this article, we’ll explore the ingredients, step-by-step preparation, tips for perfection, and variations to elevate this dish to the next level. Watch Rajma Chawal Recipe Video Ingredients Before diving into the recipe, let’s gather all the essential ingredients for making a delicious Rajma Chawal. For the Rajma (Kidney Bean Curry) For the Chawal (Rice) Step-by-Step Rajma Chawal Recipe Step 1: Soaking and Cooking Rajma Step 2: Cooking Rice Step 3: Preparing the Masala Base Step 4: Combining Rajma with Masala Step 5: Serving Rajma Chawal Tips for Perfection Serving Suggestions Common Mistakes to Avoid History and Origin Rajma was introduced to India from Mexico via trade. However, it has now become a North Indian favorite, especially in Punjabi cuisine. The dish evolved with Indian spices, making it a comforting meal widely enjoyed across the country. Health Benefits Variations Regional Cuisines Rajma Chawal is a popular dish in North India, especially in Punjab, Delhi, and Himachal Pradesh. In Jammu, small red rajma beans are preferred, giving the rajma chawal a distinct taste. Some South Indian versions incorporate coconut and tamarind for a tangy twist. Frequently Asked Questions (FAQs) 1. Can I use canned kidney beans? Yes, canned beans work well, but drain and rinse them before use. 2. How long does rajma last in the fridge? Rajma stays fresh for 2-3 days when refrigerated in an airtight container. 3. Can I freeze rajma? Yes, rajma can be frozen for up to a month. Reheat and serve with fresh rice. 4. What can I use instead of rajma? You can substitute rajma with black beans or chickpeas for a variation. 5. Can I make rajma without onions and garlic? Yes, simply use more tomatoes, ginger, and spices to balance the flavors. Rajma Chawal is a true comfort food that never fails to bring warmth and joy to a meal. Whether you prefer the classic Punjabi style or a regional twist, this dish is a must-try for every food lover! To know more about Rajma Chawal click here. Few of our other Trending Recipes: Pav Bhaji Recipe: A Delicious Journey Through India’s Favorite Street Food Palak Paneer Recipe: A Flavorful and Nutritious Indian Classic

Aloo Puri with Tomato Chutney Recipe

Aloo puri

Aloo Puri with Tomato Chutney is a classic Indian breakfast or snack beloved for its bold flavors and crispy texture. This dish combines the hearty comfort of spiced mashed potatoes stuffed into deep-fried puris with the tangy, spicy touch of fresh tomato chutney. This delightful pairing of crispy, flavorful aloo puri with zesty chutney is a favorite in homes and celebrations across India. Watch Aloo Puri with Tomato Chutney Recipe Video Ingredients For Aloo Puri: For Tomato Chutney: Step-by-Step Recipe Step 1: Soaking the Semolina Step 2: Preparing the Tomato Chutney Step 3: Preparing the Dough Step 4: Rolling and Shaping the Aloo Puris Step 5: Frying the Aloo Puris Tips for Perfection Serving Suggestions Aloo ki Puri is best served hot alongside a bowl of freshly prepared tomato chutney. Pair it with other condiments like raita, yogurt, or pickle for a more complete spread. A sprinkling of chopped coriander or a drizzle of lemon juice can also add a refreshing twist. Common Mistakes to Avoid History and Origin Aloo ki Puri traces its roots to North India, where variations of puri and potato-based dishes have been enjoyed for centuries. Traditionally served at festivals, weddings, and other special occasions, this dish is cherished for its satisfying flavors and cultural resonance. Tomato chutney, originally from South India, was later adapted across different regions, enhancing this dish with its tangy complement. Health Benefits Variations Regional Cuisines Aloo Puri is enjoyed differently across India: Each region infuses its own spices and cooking techniques, creating a delightful array of flavor profiles. Frequently Asked Questions (FAQs) Q1: Can I make Aloo ki Puri without potatoes?Yes, you can prepare plain puris without potatoes or substitute them with other vegetables like grated carrots or peas. Q2: How do I store leftover puris?Store leftover puris in an airtight container at room temperature for up to 1 day. Reheat on a tawa for best results. Q3: What can I add to the chutney to make it milder?To make the chutney milder, reduce the number of green chilies or add a small amount of sugar. Q4: Can I bake puris instead of frying them?While baking may not yield the same texture, you can try baking puris at 375°F (190°C) for 10-12 minutes. Q5: How can I make the puris puff up?Ensure the dough is soft, roll them evenly, and fry in hot oil to help them puff up. To know more about Tomato chutney click here. Few of our other Trending Recipes: Pav Bhaji Recipe: A Delicious Journey Through India’s Favorite Street Food Palak Paneer Recipe: A Flavorful and Nutritious Indian Classic

Vada Pav Recipe: The Ultimate Guide to Mumbai’s Beloved Street Food

vada pav

Vada Pav, often dubbed as the “Indian Burger,” is a beloved street food that has captured the hearts and taste buds of millions. Originating from the bustling streets of Mumbai, this humble yet flavorful snack consists of a spicy potato fritter (vada) sandwiched between a soft bread roll (pav). With its crispy exterior, soft interior, and a burst of flavors from the chutneys, Vada Pav is more than just a snack—it’s an emotion for many. In this guide, we’ll take you through everything you need to know to make the perfect Vada Pav at home, from its rich history to the step-by-step recipe. Ingredients Before checking the recipe, let’s gather all the ingredients you’ll need to create this iconic dish. For the Vada (Potato Fritter): For the Batter: For Green Chutney: For Red Dry Chutney: For Assembling the Vada Pav: Step-by-Step Recipe Now that we’ve got our ingredients ready, let’s walk through the process of making Vada Pav step by step. 1. Make the Batter: 2. Making the Green Chutney: 3. Prepare the Potato Filling: 4. Fry the Vadas: 5. Assemble the Vada Pav: Tips for Perfection Achieving the perfect Vada Pav requires a few tricks that can make all the difference: Serving Suggestions Vada Pav is typically served as a snack or a quick meal. Here are some serving suggestions to enhance your experience: Common Mistakes to Avoid To make the best Vada Pav, steer clear of these common mistakes: History and Origin Vada Pav is deeply rooted in Mumbai’s culture. It was first created in the 1960s by Ashok Vaidya, a street vendor who operated near Dadar railway station. The idea was simple yet innovative: provide a quick and affordable snack to the city’s bustling working class. The Vada Pav quickly gained popularity and became a symbol of Mumbai’s street food culture, embodying the city’s fast-paced life and its diverse culinary heritage. Health Benefits While Vada Pav is undoubtedly a treat, it also offers some nutritional benefits: However, due to its deep-fried nature, Vada Pav should be enjoyed in moderation as part of a balanced diet. Variations Over the years, many variations of Vada Pav have emerged, catering to different tastes and preferences: Regional Cuisines While Vada Pav is synonymous with Mumbai, it has made its way into various regional cuisines with slight modifications: Frequently Asked Questions (FAQs) 1. Can I bake the vadas instead of frying them? Yes, you can bake the vadas for a healthier option. Preheat your oven to 180°C (350°F) and bake them for about 15-20 minutes or until golden brown, flipping halfway through. 2. How can I store leftover vadas? Leftover vadas can be stored in an airtight container in the refrigerator for up to 2 days. Reheat them in an oven or air fryer to regain their crispiness before serving. 3. Can I freeze the vada mixture? Yes, you can prepare the vada mixture in advance and freeze it. Shape them into balls and freeze them on a tray before transferring them to a freezer bag. They can be fried directly from frozen, but the cooking time may be slightly longer. 4. What is the best way to reheat Vada Pav? To reheat Vada Pav, place the vadas in an oven or air fryer to make them crisp again. Toast the pav lightly on a griddle with some butter before assembling. 5. Is Vada Pav vegan? Yes, Vada Pav is naturally vegan as it does not contain any animal products. Just ensure that the pav buns you use are vegan, as some commercially available ones might contain dairy. To know more about Vada Pav click here. Few of our other Trending Recipes: Pav Bhaji Recipe: A Delicious Journey Through India’s Favorite Street Food Palak Paneer Recipe: A Flavorful and Nutritious Indian Classic