Baingan Bharta Recipe – The Ultimate Guide to Smoky, Flavor-Packed Delight

Baingan Bharta

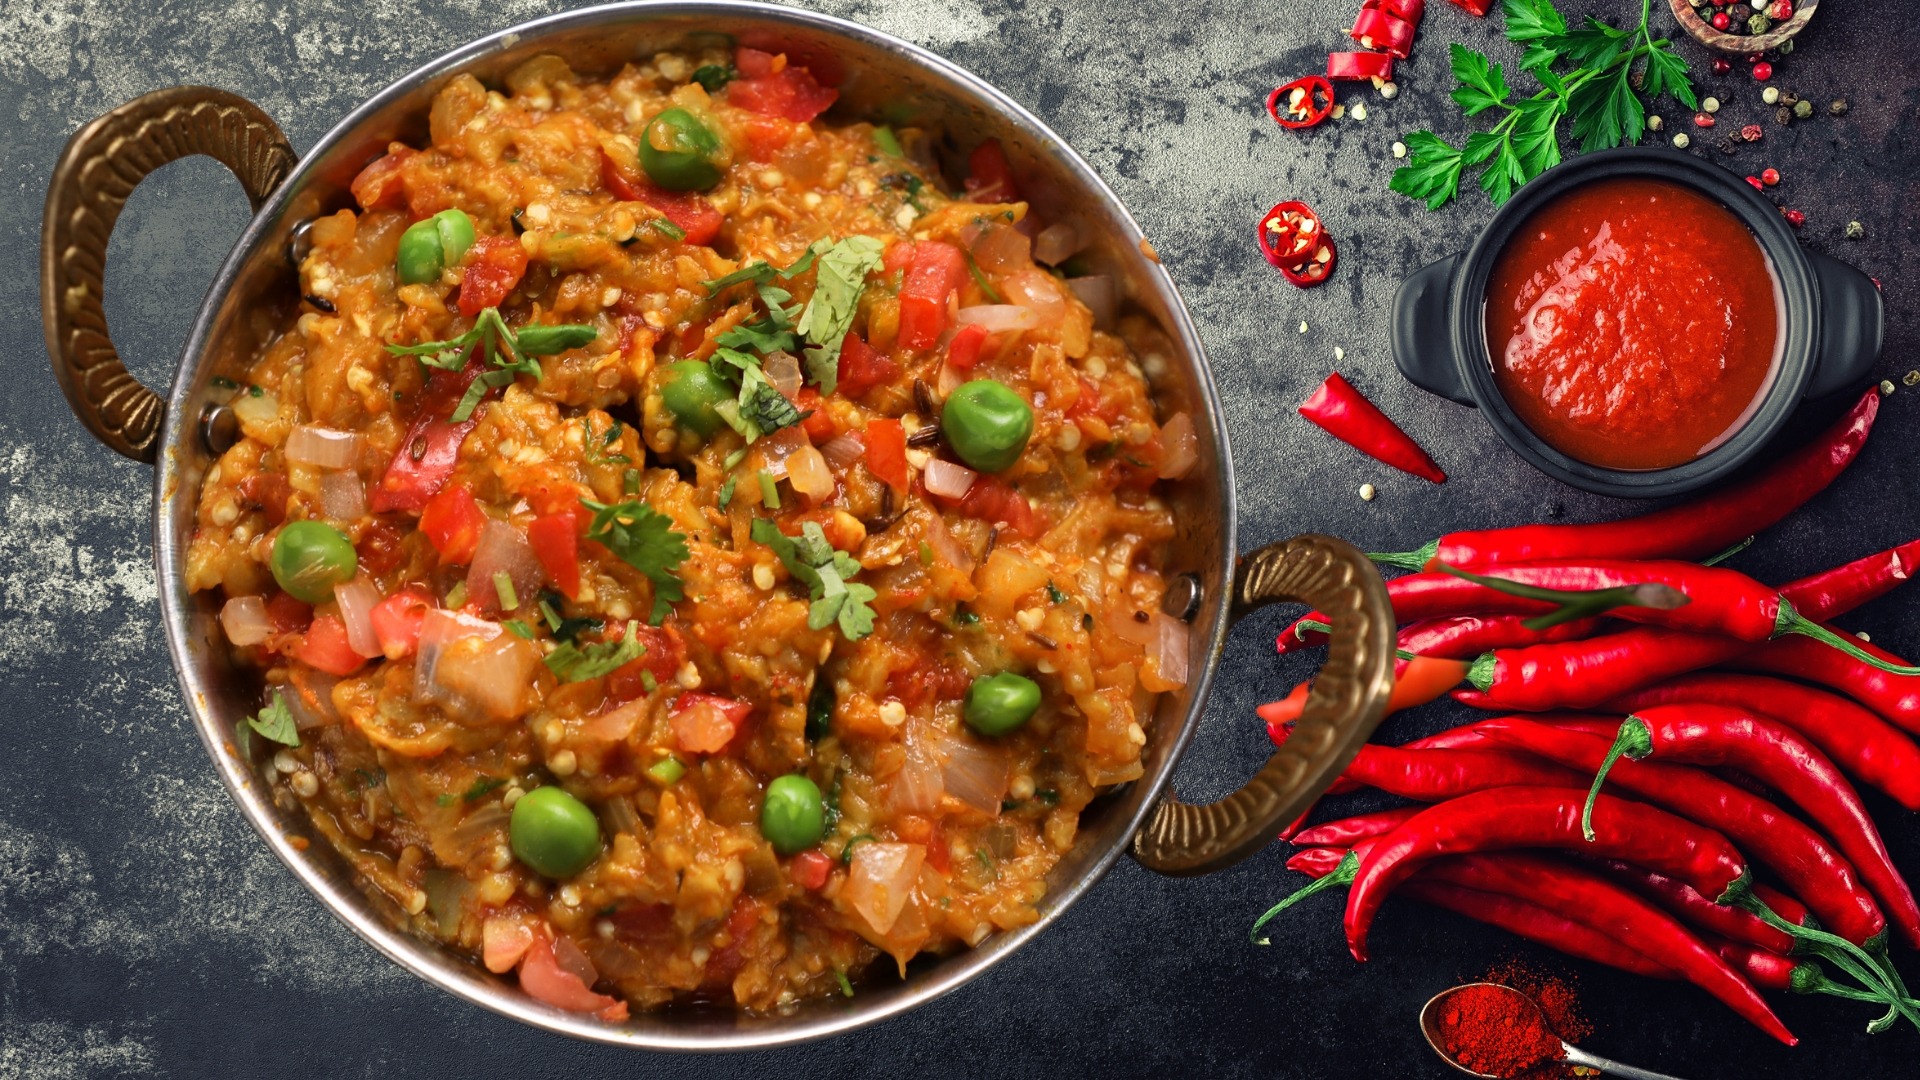
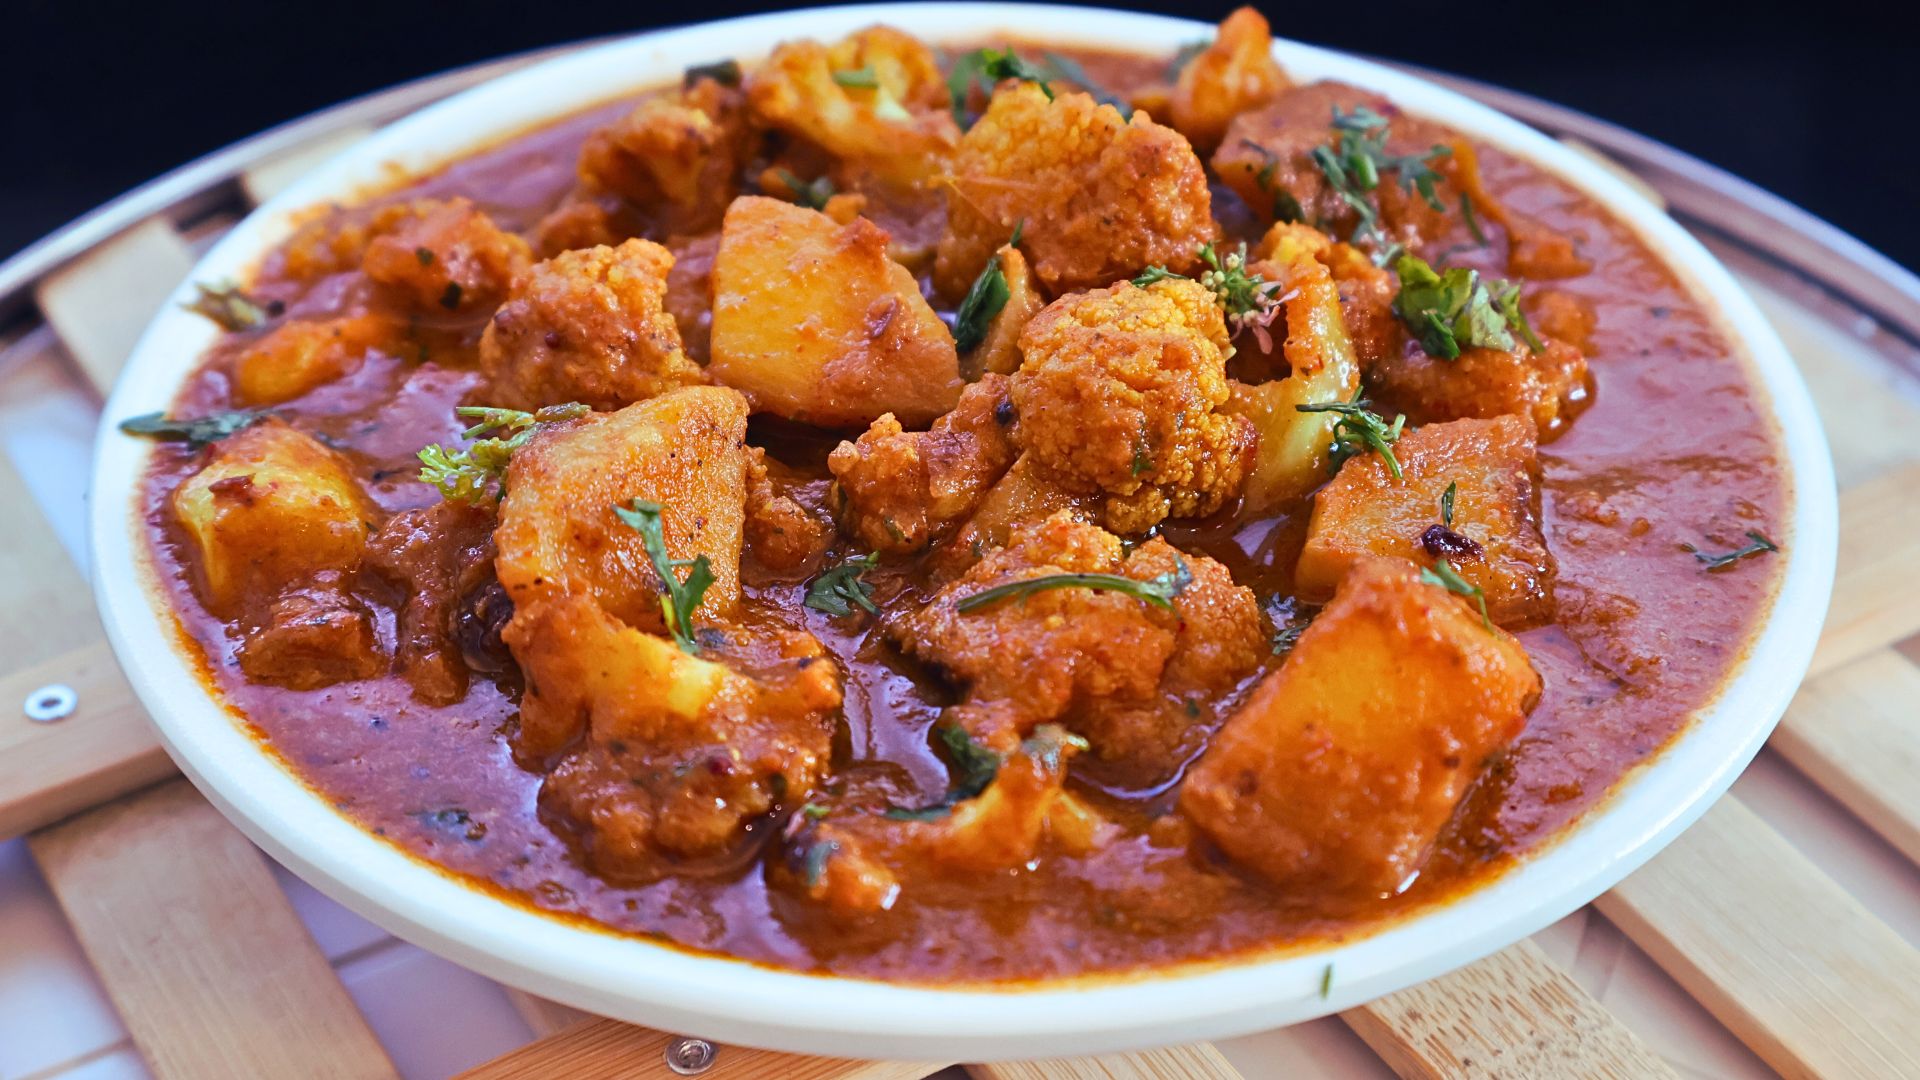
Baingan Bharta isn’t just another dish—it’s an experience. A comforting, smoky, and spicy North Indian classic, Baingan Bharta is made from fire-roasted eggplants mashed and blended with sautéed onions, tomatoes, garlic, and spices. What makes it truly magical is the smoky essence that comes from charring the eggplant over open flame—turning a humble vegetable into a sensational side dish that can win hearts across age groups. Traditionally, this dish is served with hot rotis, parathas, or even steamed rice. It’s a staple in many Indian households, especially in Punjab and Uttar Pradesh, but its fanbase stretches far beyond those regions. Whether it’s a casual dinner or a festive meal, Baingan Bharta always makes the cut for its deep, rustic flavors and versatility. Ingredients You don’t need a fancy pantry to make Baingan Bharta. Just a few staple ingredients and you’re good to go. Here’s what you need: Essential Ingredients: Optional Ingredients for an Extra Kick: All these ingredients come together to create a dish that’s as rich in flavor as it is in tradition. It’s proof that simplicity can often lead to culinary brilliance. Step-by-Step Recipe Step 1: Roasting the Eggplant Start by washing the eggplant and patting it dry. Put vertical cuts on it with a knife in a few places so it doesn’t burst while roasting also, it helps the eggplant to cook evenly. Now, the most crucial part—char it on an open flame. Place the eggplant directly on a gas stove flame or a barbecue grill. Roast it until the skin is charred and the insides become soft and mushy. This should take around 10–15 minutes depending on the size. Keep rotating the eggplant for an even roast. You’ll know it’s done when the skin is blackened, and it starts collapsing inwards. Once done, allow it to cool. Then peel off the charred skin, discard it, and mash the inner pulp using a fork. Keep it aside. Step 2: Preparing the Masala Heat oil in a kadhai or pan. Once it’s hot, add mustard seeds, cumin seeds and let them splutter. Add onions. Cook the onions until they’re golden brown. Now toss in the green peas. Cook it until it turns soft. Now, add red chili powder, turmeric powder, coriander powder, and salt. Cook this masala on medium heat till the oil starts to separate. Add tomatoes and cook until they are mushy. Don’t rush this step—well-cooked masala is the flavor base of bharta. Step 3: Mixing the Mashed Baingan Add the mashed eggplant to the cooked masala. Mix it well to coat the baingan with all those aromatic spices. Stir-fry this mix for 5–7 minutes on low to medium heat to let the flavors come together. Add garam masala at this point if you want a more intense, spiced-up bharta. Stir once and take it off the heat. Step 4: Final Touches Finish with freshly chopped coriander and a squeeze of lemon juice if you like that zing. Some people also drizzle a bit of raw mustard oil on top before serving for that extra kick and aroma. Tips for Perfection Even though Baingan Bharta is a simple dish, a few tricks can elevate it from good to incredible: Want it spicier? Add more green chilies. Prefer a richer feel? Add a spoonful of ghee before serving. Baingan Bharta is super customizable—make it your own! Serving Suggestions Baingan Bharta pairs like a dream with just about anything, but here are the best combos: Garnish with a sprig of coriander, and maybe a slice of onion and lemon on the side. Serve hot—and watch it disappear in no time! Common Mistakes to Avoid Baingan Bharta may seem simple, but it’s easy to trip up without even realizing. Avoid these common blunders if you want to nail the recipe every single time: 1. Skipping the Flame Roasting One of the biggest crimes against Baingan Bharta is roasting the eggplant in the oven only. While baking or microwaving may seem convenient, it won’t give you that deep smoky flavor the dish is known for. Always char your eggplant over an open flame for the best results. 2. Using Eggplants with Too Many Seeds An overripe eggplant filled with seeds can ruin the texture and taste of the bharta. The seeds add bitterness and a gritty feel. Always go for young, light eggplants—they have fewer seeds and a creamier interior. 3. Undercooked Masala Rushing through the onion-tomato masala stage is a rookie mistake. If the masala isn’t well-cooked, your dish will taste raw and unbalanced. Let the tomatoes break down completely and the oil separate—it makes all the difference. 4. Overpowering the Eggplant The eggplant is the hero of the dish. Overloading it with too many spices or strong ingredients can overshadow its natural flavor. Use spices to complement, not dominate. 5. Not Mashing Properly Texture matters. Lumpy bharta isn’t pleasant. Once roasted, mash the eggplant thoroughly for a silky, even consistency. If you like a chunkier bharta, keep a bit of texture—but it should be consistent throughout. 6. Serving It Cold Baingan Bharta tastes best hot or warm. When cold, the flavors dull, and the oil can separate. If reheating, gently warm it in a pan to retain the texture and taste. History and Origin Baingan Bharta has humble roots, but a deep cultural significance. Its story is as smoky as its flavor. The dish traces its origin to rural parts of North India, particularly Punjab and Uttar Pradesh. Traditionally, it was a farmer’s meal—cooked in open fields using basic ingredients and rustic techniques. Eggplants were roasted on open wood fires, and mashed with freshly harvested produce like onions, garlic, and tomatoes. In Punjab, it’s called Baingan Da Bharta, where it’s typically eaten with makki di roti and lassi. In Uttar Pradesh, it’s often paired with bajra rotis or simple parathas. Each household has its own tweak—some add yogurt, others toss in peanuts or mustard seeds. The dish’s charm lies in its simplicity. It started as a poor … Read more

Matar Kachori – A Crispy and Delicious Indian Snack

matar kachori

Matar Kachori is a popular deep-fried Indian snack, loved for its crispy outer shell and flavorful, spiced green pea filling. This dish is a favorite in North Indian households, often enjoyed with chutneys, aloo sabzi, or simply with a cup of chai. Whether you’re making it for a festive occasion, a special weekend breakfast, or just as a treat, matar kachori never fails to impress. In this detailed guide, we will explore the ingredients, step-by-step recipe, expert tips, serving ideas, common mistakes to avoid, and even the history and health benefits of this iconic dish. Ingredients For the Dough For the Filling For Frying Step by Step Recipe for Matar Kachori Step 1: Prepare the Green Pea Filling Step 2: Prepare the Dough Step 3: Assemble the Matar Kachori Step 4: Fry the Matar Kachoris Tips for Perfection Serving Suggestions Common Mistakes to Avoid History and Origin Matar Kachori has its roots in North India, particularly in states like Rajasthan and Uttar Pradesh. Traditionally, kachoris were made with lentils or spicy potato fillings. Over time, green peas became a popular variation, especially during the winter season when fresh peas are abundant. The concept of stuffed deep-fried snacks dates back centuries in Indian culinary history. Kachoris were originally made in royal kitchens and then became a common street food delicacy across India. Health Benefits While Matar Kachori is an indulgent treat, it does have some nutritional benefits: To make a healthier version, you can bake or air-fry the kachoris instead of deep frying. Variations Regional Cuisines Frequently Asked Questions (FAQs) 1. Can I make the filling in advance? Yes, you can prepare the filling and store it in the refrigerator for up to 2 days. 2. Can I freeze the kachoris? Yes, half-fried kachoris can be frozen and fried later for fresh crispness. 3. Why do my kachoris turn soft after frying? This happens if there is too much moisture in the dough or if they are fried at high heat. 4. Can I use whole wheat flour instead of all-purpose flour? Yes, but the texture will be slightly denser. 5. How do I reheat leftover kachoris? Reheat in an oven or air fryer at 180°C for 5-10 minutes to regain crispiness. Matar Kachori is a must-try dish that brings joy with every crispy, flavorful bite. Whether you enjoy it as a snack, breakfast, or part of a festive meal, its irresistible taste makes it a favorite across generations. To know more about Kachori click here. Few of our other Trending Recipes: Malai Paneer Recipe: A Creamy Delight for Every Occasion Aloo Gobi Recipe: A Classic Indian Comfort Dish

Aloo Gobi Recipe: A Classic Indian Comfort Dish

Aloo Gobi

Aloo Gobi is a popular North Indian dish that brings together the humble potato (Aloo) and cauliflower (Gobi) in a fragrant blend of spices. This classic, home-cooked meal is not only easy to make but also incredibly flavorful. It’s a staple in Indian households and can be enjoyed with roti, naan, or rice. The beauty of this dish lies in its simplicity, using everyday ingredients to create a comforting and delicious meal. Whether you’re a beginner or a seasoned cook, this step-by-step guide will help you prepare a restaurant-style Aloo Gobi at home! Ingredients To make a delicious Aloo Gobi, you’ll need the following ingredients: Main Ingredients: Spices and Seasonings: Garnishing: Step-by-Step Recipe Step 1: Preparation Step 2: Sauté the Veggies Step 3: Preparing the Base Masala Step 4: Preparing the Final Dish Tips for Perfection Serving Suggestions Common Mistakes to Avoid History and Origin Aloo Gobi has its roots in North India and Pakistan. It is believed to have originated in the Punjab region, where vegetables like potatoes and cauliflower are widely grown. Over time, the dish has gained popularity across India, Nepal, and even in Indian restaurants worldwide. Health Benefits Variations Regional Cuisines Frequently Asked Questions (FAQs) Q1: Can I make Aloo Gobi without onions and garlic? Yes, simply skip the onions and garlic. You can add a pinch of hing (asafoetida) for extra flavor. Q2: How do I store leftovers? Store Aloo Gobi in an airtight container in the refrigerator for up to 2 days. Reheat on a pan before serving. Q3: Can I use frozen cauliflower? Yes, but thaw and pat dry before cooking to avoid excess water in the dish. Q4: What’s the best way to reheat Aloo Gobi? Reheat on a stovetop with a little water to prevent drying out. Avoid microwaving as it can make the cauliflower mushy. Q5: Can I add other vegetables to Aloo Gobi? Yes, you can add peas, carrots, or bell peppers for a more colorful version. Aloo Gobi is a versatile, easy-to-make, and delicious dish that fits perfectly in any meal. Try this simple recipe and bring home the authentic taste of India! To know more about Aloo Gobi click here. Few of our other Trending Recipes: Bhagar Amti Recipe: A Perfect Dish for Fasting Days Drumstick Curry: A Delicious and Nutritious Indian Delight

Malai Paneer Recipe: A Creamy Delight for Every Occasion

Malai Paneer

Malai Paneer is a rich, creamy, and flavorful dish that holds a special place in Indian cuisine. This velvety smooth paneer dish is made with fresh cream (malai), aromatic spices, and soft paneer cubes, making it a perfect indulgence for those who love mild yet decadent flavors. Whether you’re preparing a special meal for guests or just craving a luxurious homemade curry, Malai Paneer is a perfect choice. In this article, we’ll take you through a step-by-step recipe, essential tips for making it perfect, serving suggestions, and some interesting variations. Let’s dive into the world of this mouthwatering dish! Ingredients Before you start cooking, gather these ingredients to make an authentic and delicious Malai Paneer: For the Gravy: For the Creamy Texture: For Garnishing: Step-by-Step Recipe Step 1: Frying the Paneer Step 2: Preparing the Base Step 3: Cooking the Masala Step 4: Adding the Creamy Touch Step 5: Adding the Paneer Tips for Perfection Serving Suggestions Malai Paneer pairs well with various Indian breads and rice dishes, such as: Common Mistakes to Avoid History and Origin Malai Paneer originates from North Indian cuisine, particularly from Punjabi kitchens, where dairy-based dishes are popular. The use of fresh cream, butter, and paneer is a hallmark of Punjabi food, known for its rich and indulgent flavors. Over time, this dish has become a favorite across India and even in international Indian restaurants. Health Benefits Variations Regional Cuisines and Influences Frequently Asked Questions (FAQs) 1. Can I make Malai Paneer without cream? Yes! You can substitute cream with full-fat milk and a bit of cashew or almond paste for a similar texture. 2. How do I store Malai Paneer? Store it in an airtight container in the refrigerator for up to 2 days. Reheat gently with a splash of milk. 3. Can I use store-bought paneer? Yes, but soak it in warm water for 10 minutes to soften it before using. 4. Is Malai Paneer spicy? No, it has a mildly spiced and creamy taste. You can adjust the spice level to your preference. 5. Can I freeze Malai Paneer? It’s not recommended as the cream-based gravy may separate when thawed. Malai Paneer is a comforting and indulgent dish that you can easily prepare at home. With the right ingredients and techniques, you can enjoy restaurant-style flavors in your own kitchen. Try this recipe and treat yourself to a creamy delight! To know more about Paneer click here. Few of our other Trending Recipes: Gajar Halwa Recipe – A Traditional Indian Delight Lasooni Methi Recipe – A Garlic and Fenugreek Delight

Gajar Halwa Recipe – A Traditional Indian Delight

Gajar Halwa

Gajar Halwa, also known as Carrot Halwa, is a classic Indian dessert that graces almost every festive occasion and family gathering. Made with fresh carrots, milk, sugar, and ghee, this rich and aromatic sweet treat is cherished for its creamy texture and delectable taste. Originating from North India, Gajar Halwa has gained popularity across the country and even worldwide. Whether served hot in winter or chilled in summer, it remains a favorite among dessert lovers. Watch Recipe Video Ingredients To prepare traditional Gajar Halwa, you need the following ingredients: Main Ingredients: Flavor Enhancers: These simple yet rich ingredients blend together to create the authentic taste of Gajar Ka Halwa. Step-by-Step Recipe 1. Preparing the Carrots 2. Cooking with Milk 3. Adding Sugar and Ghee 4. Adding Khoya 5. Tempering with Ghee and Nuts Tips for Perfection Serving Suggestions Common Mistakes to Avoid History and Origin Gajar Ka Halwa traces its roots back to the Mughal era when Persian and Indian culinary traditions blended. The word “Halwa” itself comes from the Arabic language, meaning a sweet dish. Over centuries, it evolved into a North Indian favorite, particularly popular in Punjab and Uttar Pradesh. Today, it is a staple in Indian households, especially during winter, Diwali, and weddings. Health Benefits While Gajar Halwa is an indulgent dessert, it does offer some health benefits: For a healthier version, one can use jaggery instead of sugar and reduce the amount of ghee. Variations 1. Vegan Gajar Halwa 2. Sugar-Free Gajar Halwa 3. Instant Pot Gajar Halwa Regional Cuisines and Their Versions Different parts of India have their own versions of Gajar Halwa: Each variation brings a unique twist to this classic dessert. Frequently Asked Questions (FAQs) 1. Can I make Gajar Halwa without milk? Yes! You can use almond milk, coconut milk, or skip milk altogether and cook the carrots in ghee. 2. How long does Gajar Halwa last? Stored in an airtight container in the refrigerator, it stays fresh for up to 5 days. 3. Can I freeze Gajar Halwa? Yes, you can freeze it for up to 3 months. Just reheat before serving. 4. What is the best way to reheat Gajar Halwa? Use a microwave for quick reheating or heat it in a pan with a little ghee for freshness. 5. Why is my Gajar Halwa not turning red? The color depends on the type of carrots. Using deep red carrots will give the best results. Gajar Ka Halwa is more than just a dessert; it’s a celebration of tradition, taste, and togetherness. Whether you’re making it for a festival or a cozy family dinner, this recipe is sure to win hearts. To know more about Gajar Halwa click here Few of our other Trending Recipes: Bhagar Amti Recipe: A Perfect Dish for Fasting Days Drumstick Curry: A Delicious and Nutritious Indian Delight

Lasooni Methi Recipe – A Garlic and Fenugreek Delight

Lasooni methi

Lasooni Methi is a delicious and aromatic Indian dish made with fresh fenugreek leaves (methi) and a generous amount of garlic (lasoon). This dish combines the slightly bitter taste of methi with the bold and rich flavor of garlic, creating a unique balance of flavors. It is a popular dish in North Indian households and is often enjoyed with rotis, parathas, or steamed rice. Whether you’re looking for a healthy, nutrient-packed meal or simply a flavorful side dish, Lasooni Methi is a great choice. Ingredients To prepare Lasooni Methi, you need the following ingredients: Main Ingredients: Spices and Seasoning: Optional Ingredients: Step-by-Step Recipe Step 1: Roasting and Grinding the Base Masala Step 2: Preparing the Fenugreek Leaves Step 3: Making the Final Dish Step 4: Final Touches and Serving Tips for Perfection Serving Suggestions Common Mistakes to Avoid History and Origin Lasooni Methi is rooted in North Indian cuisine, particularly in Punjab and Rajasthan, where garlic is widely used to enhance flavors. The dish is an extension of traditional methi-based sabzis, incorporating the rich, garlicky taste for a bold and comforting meal. Health Benefits of Lasooni Methi Variations of Lasooni Methi Regional Cuisines and How They Adapt the Recipe Frequently Asked Questions (FAQs) 1. Can I use dried methi (Kasuri Methi) instead of fresh methi? Yes, but dried methi has a more concentrated flavor, so use only 2-3 tablespoons for this recipe. 2. How do I store leftover Lasooni Methi? Store it in an airtight container in the refrigerator for up to 2 days. Reheat before serving. 3. Can I make this recipe without garlic? Garlic is the key ingredient, but if you prefer, you can reduce or skip it and add more onions for flavor. 4. Is this dish good for weight loss? Yes! Methi is low in calories and high in fiber, making it a great addition to a weight-loss diet. 5. Can I add potatoes or other vegetables to this dish? Absolutely! Adding potatoes, carrots, or bell peppers can enhance the dish and make it more filling. To know more about Methi (Fenugreek) click here To know more about Lasoon (Garlic) click here Few of our other Trending Recipes: Bhagar Amti Recipe: A Perfect Dish for Fasting Days Drumstick Curry: A Delicious and Nutritious Indian Delight

Akkha Masoor Dal Recipe – A Nutritious Delight

akkha masoor dal recipe

Akkha Masoor Dal recipe is a flavorful and protein-rich lentil dish made with whole brown lentils (masoor dal) and aromatic spices. This dish is a staple in Maharashtrian cuisine and is known for its rich, earthy flavors and wholesome texture. Unlike split masoor dal, which turns mushy when cooked, whole masoor retains its shape, giving the dish a hearty bite. Whether served with rice, chapati, or bhakri, this dal is a comforting meal that can be enjoyed by everyone. Watch Recipe Video Ingredients To prepare a delicious Akkha Masoor Dal recipe, gather the following ingredients: To Cook Akkha Masoor Dal: For Dry Masala: For Main Dish For Seasoning: Optional Ingredients: Step-by-Step Akkha Masoor Dal Recipe Step 1: Preparing the Masoor Dal Step 2: Cooking the Dal Step 3: Preparing Dry Roasted Masala Step 4: Preparing the Final Dish Step 5: Tempering (Tadka) Tips for Perfection Serving Suggestions Common Mistakes to Avoid History and Origin of Akkha Masoor Dal Recipe Akkha Masoor Dal recipe has its roots in Maharashtrian cuisine, especially in rural areas where lentils are a staple protein source. The word “Akkha” means “whole,” referring to the use of whole masoor dal instead of split lentils. Traditionally, it is cooked in clay pots with locally available spices, giving it a unique taste. Health Benefits Variations Regional Cuisines Frequently Asked Questions (FAQs) 1. Can I cook Akkha Masoor Dal recipe without a pressure cooker?Yes, you can cook it in a regular pot, but it will take longer (about 30-40 minutes). 2. Can I freeze Akkha Masoor Dal?Yes, you can freeze it in an airtight container for up to 3 months. Thaw and reheat before serving. 3. How do I make it creamier?Mash some cooked lentils or add a little coconut milk for a creamier texture. 4. Can I add vegetables to Akkha Masoor Dal Recipe dal?Yes, carrots, spinach, or bell peppers can be added for extra nutrition. 5. Is Akkha Masoor Dal Recipe gluten-free?Yes, it is naturally gluten-free and safe for gluten-intolerant individuals. To know more about Akkha Masoor(Red Lentils) click here. Few of our other Trending Recipes: Pav Bhaji Recipe: A Delicious Journey Through India’s Favorite Street Food Palak Paneer Recipe: A Flavorful and Nutritious Indian Classic

Peas Pulao(Matar Pulao) Recipe: A Flavorful and Easy One-Pot Dish

peas pulao

Peas Pulao, also known as Peas Pulao, is a simple yet delicious rice dish made with fragrant basmati rice, green peas, and aromatic spices. This one-pot meal is widely enjoyed across India and other South Asian countries due to its ease of preparation and delightful taste. Whether served as a standalone dish or paired with curries and yogurt-based sides, Peas Pulao is a perfect choice for a comforting and satisfying meal. In this article, we will explore everything about Peas Pulao, including its ingredients, step-by-step recipe, tips for perfection, serving suggestions, common mistakes to avoid, and much more. Ingredients To prepare a delicious Peas Pulao, you will need the following ingredients: Main Ingredients: Optional Ingredients for Extra Flavor: Step-by-Step Recipe Follow this step-by-step guide to make perfect Peas Pulao at home. Step 1: Preparing the Rice Step 2: Cooking the Spices Step 3: Cooking the Peas and Rice Step 4: Simmering the Pulao Step 5: Fluff and Serve Tips for Perfection Serving Suggestions Peas Pulao pairs beautifully with a variety of side dishes. Here are some serving suggestions: Common Mistakes to Avoid History and Origin Peas Pulao has its roots in Mughlai and Persian cuisine, which introduced aromatic rice dishes to the Indian subcontinent. Over time, it became a staple in many South Asian households, known for its simplicity and comforting flavors. Traditionally, pulao was considered a royal dish prepared with saffron and nuts, but the simpler versions like Peas Pulao became popular for everyday meals. Health Benefits Peas Pulao is not just tasty but also offers several health benefits: Variations Peas Pulao can be customized in many ways to suit different tastes: Regional Cuisines Different regions have their own versions of Matar Pulao: Frequently Asked Questions (FAQs) 1. Can I make Matar Pulao in a rice cooker?Yes! Follow the same steps, but cook everything in a rice cooker instead of a stovetop. 2. Can I use brown rice instead of basmati?Yes, but increase the cooking time and water ratio accordingly. 3. How do I store leftover Matar Pulao?Store it in an airtight container in the refrigerator for up to 2 days. Reheat with a splash of water to retain moisture. 4. Can I make it without onions and garlic?Absolutely! Just skip them and add extra whole spices for flavor. 5. What can I use instead of peas?You can replace peas with corn, chickpeas, or mixed vegetables. Matar Pulao is an easy and flavorful dish that suits every occasion. Whether you are a beginner or an experienced cook, this simple recipe is sure to become a staple in your kitchen! To know more about Peas pulao click here. Few of our other Trending Recipes: Pav Bhaji Recipe: A Delicious Journey Through India’s Favorite Street Food Palak Paneer Recipe: A Flavorful and Nutritious Indian Classic

Aloo Paratha with Green Chutney Recipe

Aloo Paratha

Introduction Aloo Paratha with green chutney is a beloved North Indian dish that combines the rich flavors of spiced mashed potatoes stuffed inside crispy, golden wheat bread. This hearty and flavorful dish is a staple breakfast in many Indian households and is often paired with yogurt, pickles, or butter for an indulgent meal. What makes Aloo Paratha special is its versatility—it can be enjoyed at any time of the day and customized with different flavors and spices. The addition of green chutney, made from fresh herbs like coriander and mint, enhances the taste with a refreshing kick. In this article, we will guide you through the step-by-step process of making Aloo Paratha, provide tips for perfection, discuss its origins, and explore its health benefits and variations. Let’s start! Watch Recipe Video Ingredients For the Dough: For the Potato Stuffing: For the Green Chutney: Step-by-Step Recipe Step 1: Prepare the Green Chutney Step 2: Prepare the Dough Step 3: Make the Potato Stuffing Step 4: Roll and Stuff the Paratha Step 5: Cook the Aloo Paratha Step 6: Serve and Enjoy! Tips for Perfection Serving Suggestions Aloo Paratha pairs well with: Common Mistakes to Avoid History and Origin Aloo Paratha originates from the Punjab region of India and Pakistan. It was traditionally prepared in rural households as a filling and nutritious meal. Over time, it became popular across India and is now a staple in many Indian restaurants worldwide. The combination of spiced potatoes and crispy bread makes it a favorite comfort food. Health Benefits Variations Regional Cuisines Frequently Asked Questions (FAQs) 1. Can I make Aloo Paratha ahead of time?Yes! Cooked parathas can be refrigerated and reheated on a tawa. 2. Can I use store-bought chutney?Absolutely, but homemade chutney is fresher and more flavorful. 3. Can I freeze Aloo Paratha?Yes, stack them with parchment paper and freeze them for up to a month. 4. What can I use instead of potatoes?You can use sweet potatoes, cauliflower, or paneer for a variation. 5. Can I make Aloo Paratha gluten-free?Yes! Use gluten-free flour like jowar or bajra instead of wheat flour. Enjoy your homemade Aloo Paratha with Green Chutney and impress your family with this traditional Indian delicacy! To know more about Aloo Paratha click here. Few of our other Trending Recipes: Pav Bhaji Recipe: A Delicious Journey Through India’s Favorite Street Food Palak Paneer Recipe: A Flavorful and Nutritious Indian Classic

Ukadiche Modak Recipe: A Traditional Maharashtrian Dumpling

Ukadiche Modak

Ukadiche Modak is a famous traditional Indian sweet dumpling, primarily associated with Maharashtra. The name “Ukadiche” translates to “steamed” in Marathi, indicating the cooking method used for these delicious treats. These sweet dumplings are filled with a rich coconut and jaggery stuffing, encased in a soft rice flour dough, and steamed to perfection. Ukadiche Modak holds special significance during Ganesh Chaturthi, a festival dedicated to Lord Ganesha. It is believed to be his favorite sweet, and devotees prepare these as an offering to seek his blessings. With its delicate texture and divine sweetness, Ukadiche Modak is a must-try recipe for any festive occasion. Watch Ukadiche Modak Recipe Video Ingredients Before we get started, let’s take a look at the ingredients required to make these mouthwatering Modaks. For the Outer Covering: For the Sweet Coconut Filling: Step-by-Step Recipe for Ukadiche Modak Now, let’s go through the detailed step-by-step method to prepare authentic Ukadiche Modak at home. Step 1: Prepare the Coconut-Jaggery Filling Step 2: Make the Rice Flour Dough Step 3: Shape the Modaks Step 4: Steam the Modaks Tips for Perfection Serving Suggestions Common Mistakes to Avoid History and Origin Ukadiche Modak traces its roots to Maharashtra and has been mentioned in ancient texts. It is believed that Lord Ganesha loved these sweets, which is why they are prepared as prasad (offering) during Ganesh Chaturthi. Health Benefits Variations Regional Cuisines Frequently Asked Questions (FAQs) 1. How to store Ukadiche Modak?Steamed Modaks stay fresh for 1 day at room temperature and 2-3 days in the refrigerator. 2. Can I use wheat flour instead of rice flour?Traditional Modaks use rice flour, but you can experiment with wheat flour for a different texture. 3. What is the best way to prevent cracks in Modak?Knead the dough while warm and keep it covered with a damp cloth. 4. Can Ukadiche Modak be made without a mold?Yes, shaping by hand is the traditional method. Simply pinch and fold the edges carefully. 5. How long do steamed Modaks last?They taste best when fresh but can last 2-3 days if refrigerated. Ukadiche Modak is not just a sweet; it’s a cultural experience that brings families together during festivals. Try this authentic recipe and enjoy the divine taste of this Maharashtrian delicacy! To know more about Ukadiche Modak click here Few of our other Trending Recipes: Misal Pav Recipe: A Spicy Delight from Maharashtra Pohe Recipe: A Step-by-Step Guide